Create a Custom Field
A custom field can be applied to a Printer Profile, a User Profile, or to a specific Application. This task walks you through the process of creating the custom field and then adding the field values.
- Select Administration from the ribbon.
- Select Custom Fields → List.
- Click Create.
-
Type a caption for this custom field that will appear in the Workflow Client. You can enter up to 15 characters including spaces.
- Choose the type of field you need. Options are:
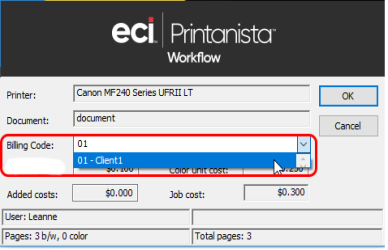
- Searchable drop-down – Uses a type-ahead drop down box search so the user does not need to use a separate search window. It keeps track of the last ten used values, but only supports fields that have up to one thousand values. This field type supports adding new values from the Client. Allows the user to start typing in the field and matching items appear in the drop-down list. In the example below, the Billing Code field is a searchable drop-down custom field. Note that there is no limit to the numbers fields within this list.
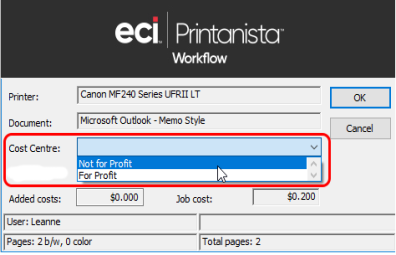
- Simple drop-down – Presents a predefined list of options for the user to choose from. In the example below, the Cost Center field is a Simple drop-down list. This type does not keep track of the last ten used values, and only supports fields that have up to one hundred values. It does not support adding new values from the Client. This field works best for a small set of selectable items for a print job, such as added materials needed like binding or shipping. Note that there is no limit to the numbers fields within this list.
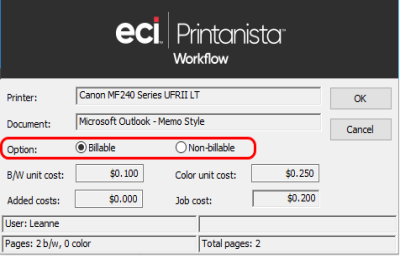
- Option – Creates radio buttons where the user can choose only one option. This type only supports only two values and is generally used for "yes, no" options like Billable and Non-Billable as shown in the example below.
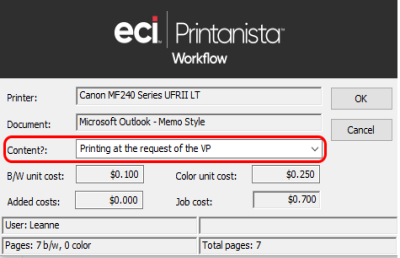
- Non-validated – Presents a free-form text entry field to the user. In the example below the field asks for a reason for printing. The user can type any information and the data is simply gathered.
- Linked – Presents a set of two lists to the user. The options available in the second list are dependent on the selection from the first list. For example, you could define a linked custom field with "Customer" as the main field, "Project" as the sub field. You could then enter all of your customers into the Customer values list, and for each customer, enter the valid projects. When a user prints, they can first select the Customer and then see a list of only those projects for that customer. Using Linked Custom Fields presents the following limitations:
You cannot specify cost modifiers or budgets for main codes, only sub codes.
When importing values for linked custom fields, you must use the proper import format.
When adding or editing custom field values for linked fields, the process is different.
- Both the parent and the child custom field can have a cost modifier and budget associated with it.
- Click Create to proceed with defining values for the custom field.


Add Values to the Custom Field
- In the 'Manage Values' screen, you can now create each entry that will appear in the custom field one item at a time. This can take some planning and foresight. For example, if creating an Option field for 'Billable' and 'Non-billable', you need to create two separate values - one for billable, and one for non-billable. To add a new value, click Create to open the Create Custom Field Value screen. Make selections or entries in the following fields:
- Code - Each value must be identified with a unique code with the custom field. Codes can be re-used between custom fields (i.e. two different custom fields can use the same code).
- Is active - When active, the value is available to be used in any custom field.
- Description - Describe the field and purpose of this value.
- Budget - Set this option to 'Yes' to view the monetary value of pages remaining for the user.
- Modifier - When this option is selected, a modifier is added to the job. For example, you might add a modifier based on the unit cost, unit percentage, added cost, or added percentage. In the case of stapling, you might add a straight cost per job (.05), or in the case of binding you might add a percentage to the overall job cost (10%).
- To add just this one value, click Create and Close. To create another value without closing the screen, click Create and Add More.
