Installation of Client Services
Additional client services will be required in larger environments, to distribute load, or to support secure printing with multiple print servers. The steps below will walk you through the process to:
- Install additional client services
- Replicate the site key between primary and additional client services systems
- Create a server entry for additional client services
Installation Steps
Click 'Next' between each step below to advance through the installation wizard. When installation of the files is complete, the configuration wizard will launch a browser to walk you through initial configuration.
- Launch the installer.
- Accept the license agreement.
- Choose Step by Step as the install type.
- Browse to the folder where you want to install the software.
- Confirm the default installation folder or click the ... button to select a different location for the files.
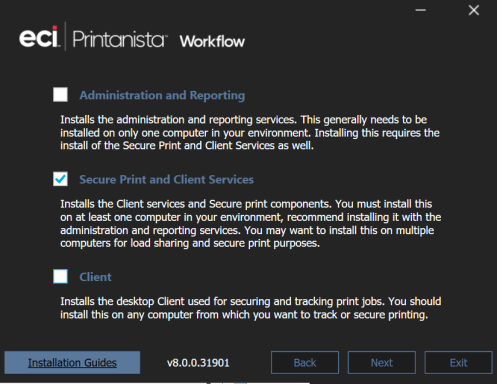
- Choose only the Secure Print and Client Services – These services are required to implement secure print release and to support the Printanista Workflow Client software that you will later deploy to client workstations
- The Secure Print and Client Services option requires Internet Information Services (IIS). IIS is automatically installed if not detected on the server.
-
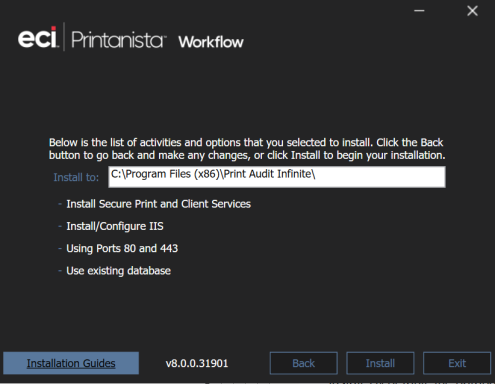
Review the list of items that will be installed at the Install to path. Click Install to complete the wizard.
-
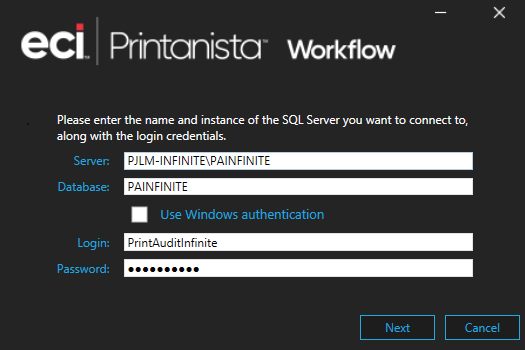
Identify the database created during the Primary server install. By default, the database name is 'PAINFINITE'. Click Next.
-
When installation completes click Done and proceed to replicating the site key.
Replication of Site Key
- From the original server navigate to the site key (sitekey.config). The default location is C:\Program Files (x86)\Print Audit Infinite\api
- Copy the site key to the same location on the additional server(s). When prompted replace the file in the destination.
- Restart the website on the remote client services system(s) through IIS Administration console
- Restart the Workflow Release Service on the remote client services system(s) through Services.msc.
Creation of Server Entry
- After completing the installation of additional Secure Print and Client Services and replication of the site key from the primary server, navigate to the Printanista Workflow Administration interface (i.e. https://[serverhostname]).
- Authenticate to Printanista Workflow and navigate to Administration -> Servers. Click Create.
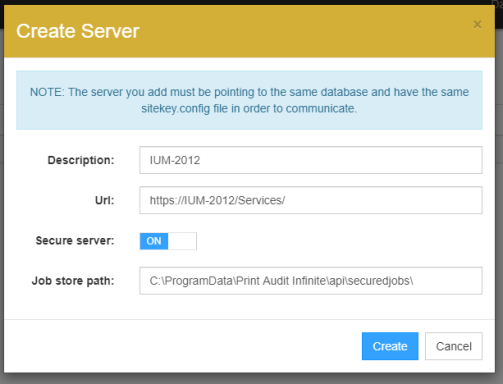
3. Populate the Description and additional client services URL. If applicable, enable the Secure Server option and provide a Payload Path for secure jobs. Click Create. **Note: Default payload location is C:\ProgramData\Print Audit Infinite\api\securedjobs\


