
Further Configuration of Versalink devices
Typically, devices will register successfully without following these instructions. These instructions for further configuration are provided to assist in the event that device registration is not successful.
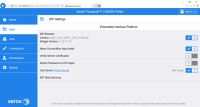
Enabling EIP Applications
-
From the side menu, navigate to EIP Settingss.
- Ensure Allow ConnectKey App Install is enabled.
- Set the Verify Server Certificates to disabled.

-
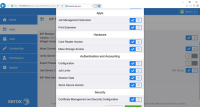
Under Authentication and Accounting, select EIP Web Services.
- Ensure Xerox Secure Access is enabled.

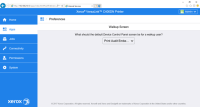
Configuring the Default Walkup Screen
-
From the side menu, navigate to Apps and select Preferences on the top menu
(Note: You may be prompted to enter admin credential)


-
Under the Walkup Screen section, select Print Audit Embedded for Xerox from the dropdown
-
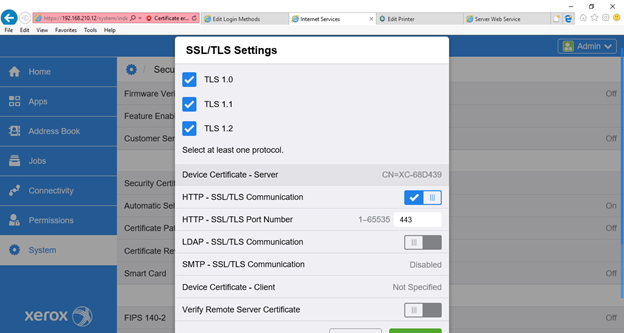
From the left Menu, select System. Under the Security section select SSL/TLS Settings.
-
Ensure the appropriate TLS protocols are enabled
-
Set the "HTTP - SSL/TLS Communication" to enabled
-
Verify the "HTTP - SSL/TLS Port Number" is set to 443

-

-
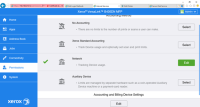
From the left Menu, select Permissions. Select Accounting Method and select Edit next to Network

-
Under the Tracking Information section, selectEdit
-
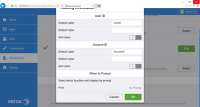
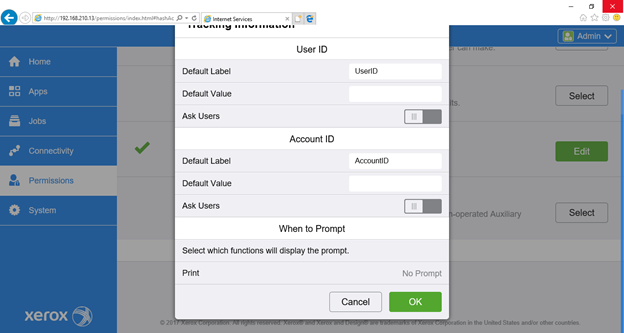
Under the "User ID" section ensure the "As Users" Setting is disabled
-
Under the "Account ID" section ensure the "As Users" Setting is disabled
-
Under "When to Prompt" section ensure all functions are set to "No Prompt"
-
-
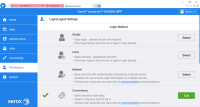
From the left Menu, select Permissions. Then select Login/Logout Settings

-
Next to Convenience login method, select Edit.
-
Configure the IP Address and Port of the system hosting the Xerox Embedded software
-
Configure the Path as /xerox/Listeners/AuthenticationListener.svc
-
Set the Alternate Login Setting to Yes
-
Set the Accounting Codes section to Get codes automatically from server
-