
Manual registration method for Embedded for Lexmark (eSF4)
Users installing Embedded for Lexmark must have Administrator rights.
Overview
If automatic registration fails, or is not supported on the desired models, manual registration of the embedded may be required.
The following steps are explained in more detail below, and will need to be executed, to achieve manual registration:
- Install the embedded application to the MFP
- Create the Security Template
- Set the Access Controls
- Configure Workflow Server Settings
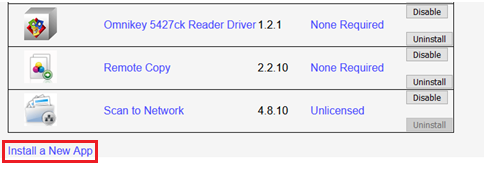
Install the embedded application to the MFP
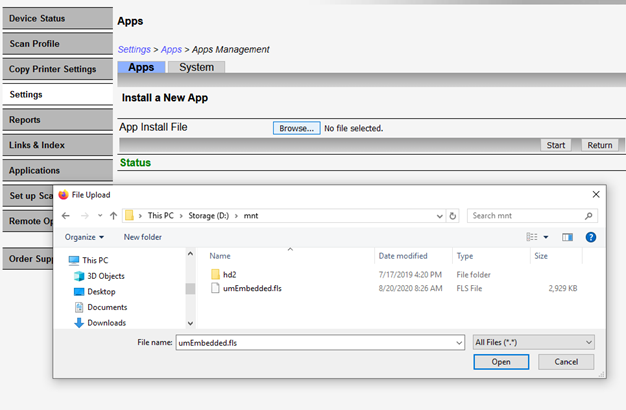
- Using a web browser, open the Lexmark MFP web interface.
- From the Settings menu on the left, and then select Other Settings → Apps.

- Select App Management → Install a New App.
- Select the Choose File button.

- From the Open dialog, select the Embedded for Lexmark .fls file and click the Open button.
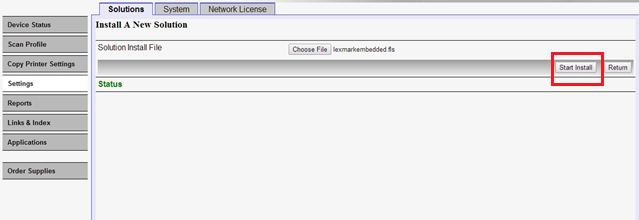
- Click the Start Install button. The installation may take up to one minute. When the installation is complete, you will see the message:
The following solutions were successfully installed.
Print Audit Lexmark Embedded.
Create the Security Template
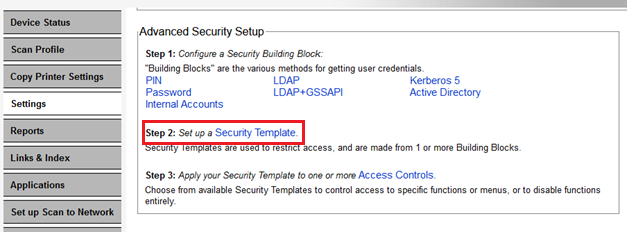
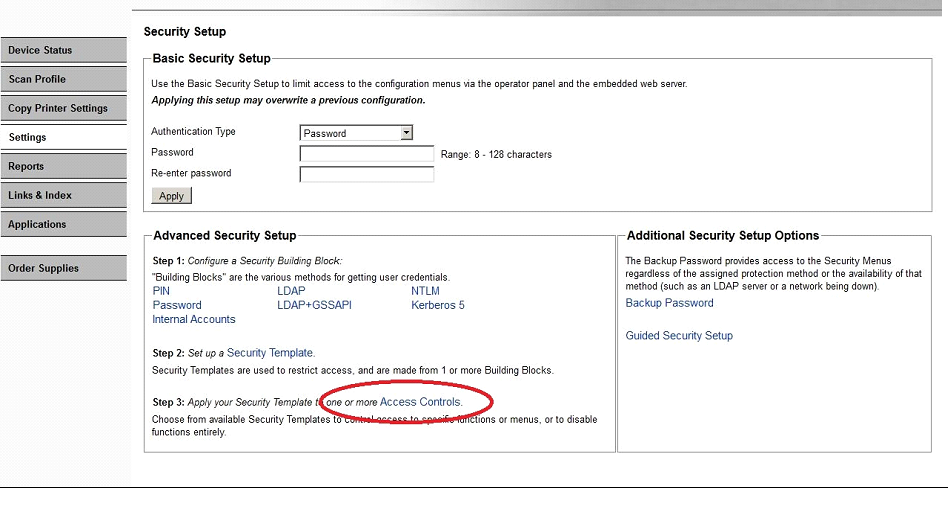
- From the Lexmark MFP web interface, navigate to the Advanced Security Setup page
- Select Step 2: Setup a Security Template
- Add a Security Template Name
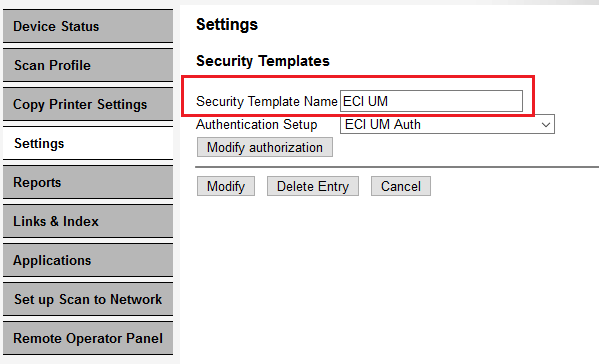
- Enter a Authentication Setup Name
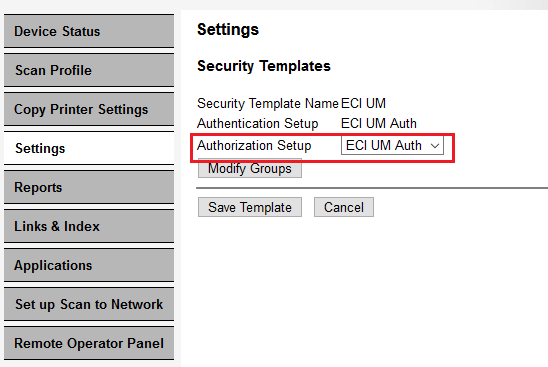
- Enter a Authorization Setup Name
- Create a name for the ECI UM Security Template (use UM group).

- Click the Save Template button and the Security Template is created.
Set the Access Controls
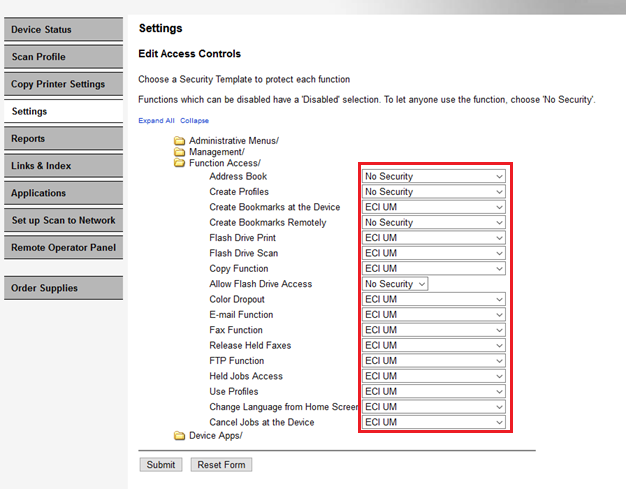
- From the Lexmark MFP web interface, select Settings from the menu.
- Within the Settings menu, select Security in the Other Settings list.
- Select Security Setup from the Security list.


- From the Edit Access Controls page set the MFP functions that will use the Security Template you created in the previous step, by selecting the the Security Template name from the Function Access drop down menus. The following are the recommended settings:
- Flash Drive Print
- Flash Drive Scan
- Copy Function
- Email Function
- Fax Function
- FTP Function
-
Once you have completed setting the access controls, click the Submit button to save your settings.
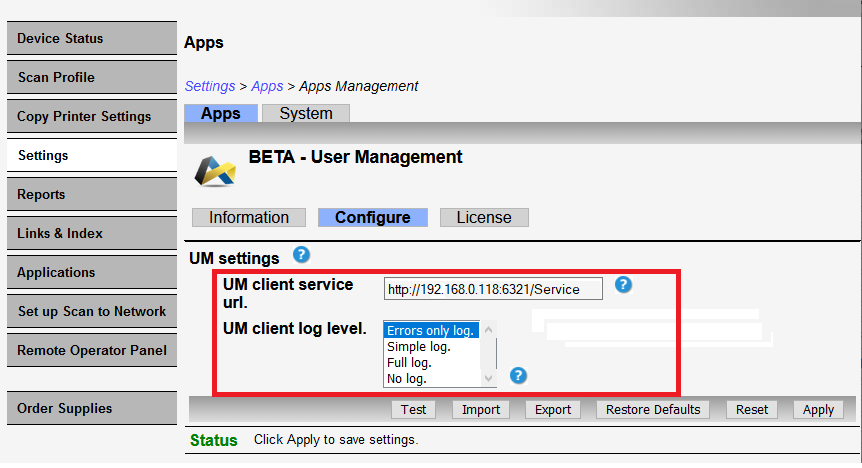
Configure Workflow Server Settings
Basic Workflow settings can be applied through the Lexmark MFP Embedded webpage.
- From the Lexmark MFP web interface, select Settings from the menu.
- Within the Settings menu, select Apps → Apps Management list.

- Select the Configure tab.
Printanista Workflow client service URL http://192.168.0.118:6321/Services
Workflow uses ports 80/443 when handling Client communication and securing jobs. If the installer detects that these ports are already in use, 6320/6321 are used instead. Alternatively, you can choose other available ports as needed. Ensure you confirm the existing port assignments on your network to prevent conflicts prior to installing Workflow.
Log Level for the application
- Once you have completed configuring the settings, click on Apply to save changes.