Integration with Printanista Hub
For organizations that are supported by Printanista Hub for device meter collection, an integration with Printanista Workflow is available to provide Printanista Hub with page counts from locally connected devices.
Devices that do not support SNMP or which are not connected directly to the network are referred to as "Local Devices". In most cases, local devices connect to a computer using USB or parallel port. Even if they are shared on the network, they are not directly connected to the network (ie: they have no IP address) and cannot be supported with SNMP.
Printanista Hub already collects printer data from network connected devices, but for the collection of page counts from your non-networked, local devices, an integration with Printanista Workflow is provided to support the collection of page counts from your local devices.
Integration requirements
Before Printanista Workflow is configured to upload data from local printer, the following are required:
-
A username and password in Printanista Hub.
-
An account with a DCA must exist within Printanista Hub.
-
The user must have appropriate permission level to manage the DCA installed on the corresponding Printanista Workflow network.
Once these criteria are met, please proceed to the instructions to configure the Printanista Hub integration to enable data collection from locally-connected devices.
Prior to enabling your integration, it is highly recommended to review the Hub Integration Best Practices and FAQ.
Integration configuration steps
The following are the steps to enable the Printanista Hub integration with Printanista Workflow
-
Review the integration Best Practices and FAQ.
1. Install and Configure Printanista Workflow
Download the Printanista Workflow application and obtain a valid license to enable the application for local-device tracking.
Install Printanista Workflow. A full set of installation articles are available here.
Open the Printanista Workflow Administration console and enter the License key and Company Name combination to successfully license your installation.
2. Deploy the Printanista Workflow Client to any workstations requiring local tracking
To collect page counts from a printer connected to a workstation, the Workflow Client must be installed on that workstation. The Workflow Client can be deployed to workstations using Group Policy, Client Status/Deployment tool or manual installation. Please see review the client deployment instructions in this Help Portal for more information regarding these deployment methods.
3. Configure the locally-connected devices
All printers within Printanista Workflow flagged as "Local" are uploaded to Printanista Hub automatically. No additional configuration is required.
Local devices may be manually pre-populated with the data, such as location, asset number, initial life counts.
4. Configure Printanista Hub integration
Log into the Printanista Workflow website with Administrator credentials
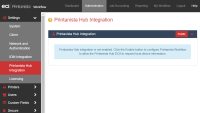
Go to Administration --> Settings --> Printanista Hub Integration
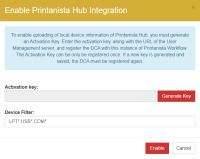
Select Enable to open the Integration enablement window.
The Device Filter field is populated by default with local printer type extensions but can be modified if desired.
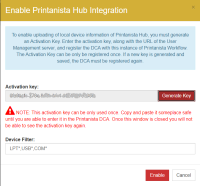
Select Generate Key to retrieve the activation key for the integration
Copy and paste this key before proceeding further. Keep this key somewhere safe, so that you can then enter it into the ECI DCA configuration for this account, to complete your integration configuration. This key cannot be viewed again once you proceed.
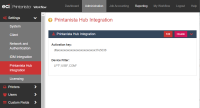
Select Enable to activate the integration setup, before proceeding to complete the integration steps in Printanista Hub.
5. Complete the final integration steps in Printanista Hub
Log into Printanista Hub and navigate to Administration > Server > Integrations > Integrations and Features
Ensure that Printanista Workflow Integration is Enabled
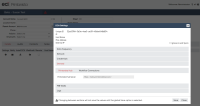
Next, in Printanista Hub navigate to the Account which corresponds with the Printanista Workflow instance for integration, and open the DCA Settings for that account.
Navigate via Accounts > Installs> Settings
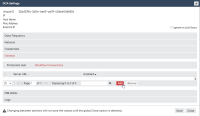
In the General section, select Workflow Connections, then select Add.
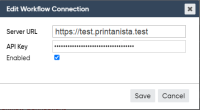
In the Edit Workflow Connection window, enter the Server URL of the Printanista Workflow server and the API key that was generated in the Step 4, above.
Select Save to close the window and save your settings.
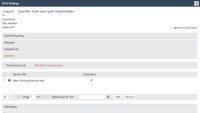
The Printanista Workflow server URL will now appear in the list of Worklfow Connections, with a checkmark indicating the connection is now enabled.

